
Amazon S3 offers a fantastic feature for hosting static websites, making it effortless to publish your web applications and content to the world.
In this article, we'll explore how to deploy a React app on Amazon S3. We'll cover the following steps:
- Build your React app
- Create an S3 bucket
- Enable static website hosting
- Upload your React app
- Access the app
- Best Practices
Build your React app
Before you can deploy your React app on Amazon S3, you need to build it. This process will create a production-ready version of your app that you can upload to your S3 bucket.
To build your React app, run the following command:
npm run build
This command will create a build folder in your project directory. This folder contains all the files you need to deploy your React app on Amazon S3.
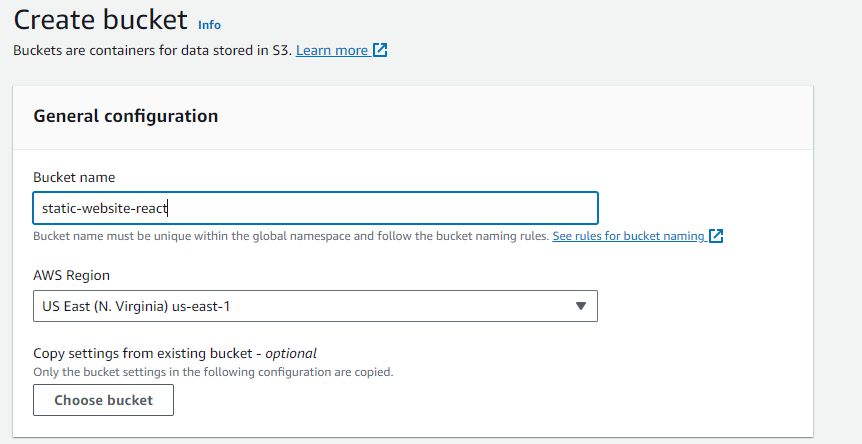
Create an S3 bucket
As the first step in deploying your React app on Amazon S3, you need to create an S3 bucket. This bucket will store your app's files and make them accessible to the world. To do it, first create a new S3 bucket in the AWS Management Console in the region of your choice with the default settings.
Then in the permissions tab, uncheck the "Block all public access" option and acknowledge the warning.

Then, go to the "Bucket policy" section and add a policy that allows public read access to your objects. Here's an example policy:
{
  "Version": "2012-10-17",
  "Statement": [
    {
      "Sid": "PublicReadGetObject",
      "Effect": "Allow",
      "Principal": "*",
      "Action": ["s3:GetObject"],
      "Resource": ["arn:aws:s3:::your-bucket-name/*"]
    }
  ]
}
Make sure to replace your-bucket-name with the name of your bucket.
Enable static website hosting
Now that you've created your S3 bucket, you need to enable static website hosting. This feature will allow you to host your React app on Amazon S3.
To enable static website hosting, go to the "Properties" tab of your S3 bucket and click on the "Static website hosting" card.
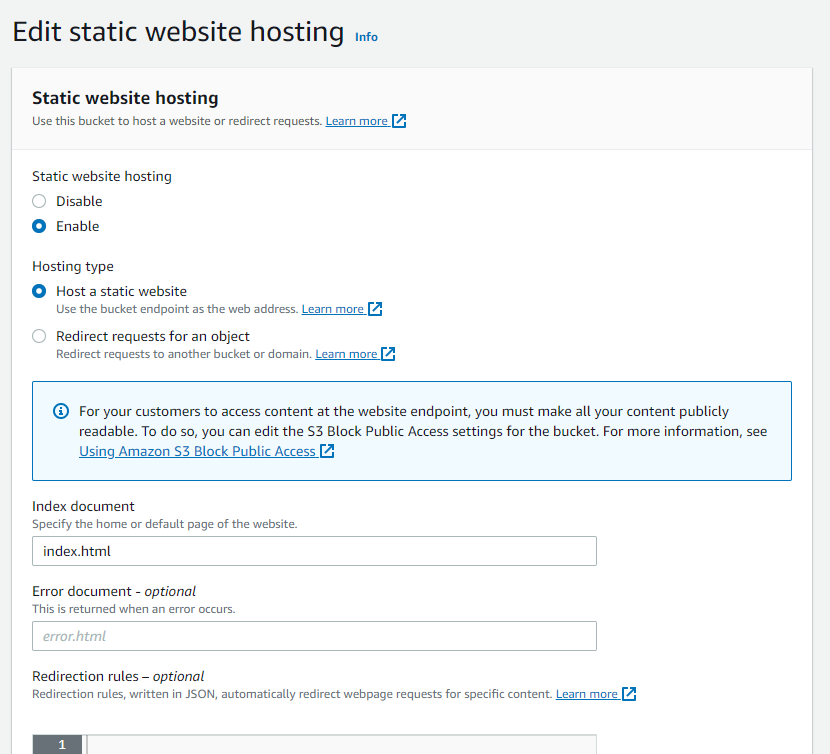
Then, select the "Use this bucket to host a website" option and enter index.html as the index document.
Upload your React app
Now that you've enabled static website hosting, you can upload your React app to your S3 bucket.
You can upload your app's files to your S3 bucket using the AWS Management Console (recommended for small apps) or the AWS CLI (recommended for large apps).
To upload your app's files using the AWS Management Console, go to the "Overview" tab of your S3 bucket and drag and drop the build folder into the "Upload" box.
To upload your app's files using the AWS CLI, run the following command:
aws s3 sync build/ s3://your-bucket-name
Make sure to replace your-bucket-name with the name of your bucket.
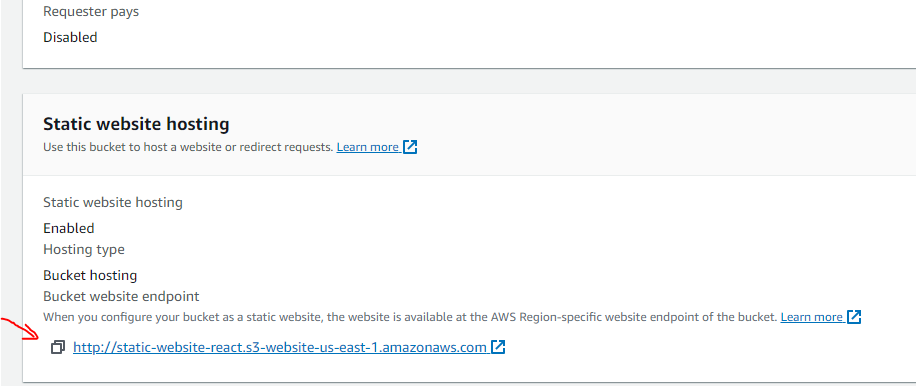
Access the app
Now that you've uploaded your React app to your S3 bucket, you can access it using the S3 bucket's website endpoint.
Best Practices
For more advanced users or those looking to optimize their React app deployment on Amazon S3, here are some additional steps and considerations:
-
CDN Integration: To improve the speed and performance of your app, consider integrating a Content Delivery Network (CDN) like Amazon CloudFront with your S3 bucket. CloudFront can cache and distribute your content to edge locations, reducing latency for users across the globe.
-
Custom Domain: Instead of using the default S3 bucket URL, you can configure a custom domain for your React app. This involves setting up DNS records (e.g., using Amazon Route 53) to point your domain to your S3 bucket's CloudFront distribution or directly to the S3 static website endpoint.
-
HTTPS/SSL: Enable HTTPS for your React app to ensure secure communication between users and your website. You can use AWS Certificate Manager to obtain a free SSL/TLS certificate and configure it with CloudFront if you're using a custom domain.
-
CI/CD Pipeline: Set up a continuous integration and continuous deployment (CI/CD) pipeline to automate the deployment process. Tools like AWS CodePipeline and AWS CodeBuild can help you automate the build and deployment of your React app whenever you push changes to your repository.
-
Versioning: Implement versioning for your static assets (e.g., CSS and JavaScript files) to ensure that users receive the latest version of your app and avoid caching issues. You can add a unique query string or use a versioning strategy in your build process.
-
Security Headers: Implement security headers in your app to enhance security. For example, you can configure HTTP security headers like Content Security Policy (CSP).
These additional steps can help you fine-tune your deployment and ensure the best possible performance, security, and scalability for your React app hosted on Amazon S3.