AWS App Runner is a fully managed service that makes it easy for developers to build, deploy, and scale containerized applications.
1. Create a sample Flask app
Let's start by creating a simple Flask app that will serve as our example application. Folder structure of the Flask app we'll deploy to AWS App Runner:

We'll use the following code for our Flask app (app.py)
    from flask import Flask
    app = Flask(__name__)

    @app.route('/')
    def hello():
      return "Hello World from Flask and AppRunner!"

    if __name__ == '__main__':
      app.run(host='0.0.0.0', port=5000)
The project has only one dependency, Flask. We'll use a requirements.txt file to specify the dependencies. (We did not specify a version for Flask, so the latest version will be installed.)
flask
and a Dockerfile to build the Docker image for our Flask app.
    FROM  python:3.10-slim-buster

    WORKDIR /app

    COPY requirements.txt requirements.txt
    RUN pip3 install -r requirements.txt

    COPY ./src .

    EXPOSE 5000

    ENTRYPOINT ["python3"]
    CMD ["app.py"]
2. Build and test the Flask app locally
Let's build and test the Flask app locally before deploying it to AWS App Runner. To build the Docker image, run the following command:
docker build -t flask-apprunner-img .
and to run the Docker image, run the following command:
docker run -p 5000:5000 flask-apprunner-img
Your Flask app should now be running locally at http://localhost:5000. Test it in your browser or with a tool like curl.
3. Push the Image to Amazon ECR
Amazon Elastic Container Registry (ECR) is a fully managed container registry that makes it easy for developers to store, manage, and deploy Docker container images.
To push the Docker image to Amazon ECR, we'll first need to create a repository. To do so, run the following command:
aws ecr create-repository --repository-name flask-apprunner
This will create a repository named flask-apprunner in the default region configured in the AWS CLI. You can also specify a region using the --region option.
Next, we'll need to tag the Docker image with the URI of the repository we just created. To do so, run the following command:
aws ecr get-login-password --region <your-region> | docker login --username AWS --password-stdin <your-account-id>.dkr.ecr.<your-region>.amazonaws.com
This will log you in to the Amazon ECR registry. Next, tag the Docker image with the URI of the repository we just created:
docker tag flask-apprunner-img:latest <your-account-id>.dkr.ecr.<your-region>.amazonaws.com/flask-apprunner:latest
Finally, push the Docker image to Amazon ECR:
docker push <your-account-id>.dkr.ecr.<your-region>.amazonaws.com/flask-apprunner:latest
4. Deploy the Flask app to AWS App Runner
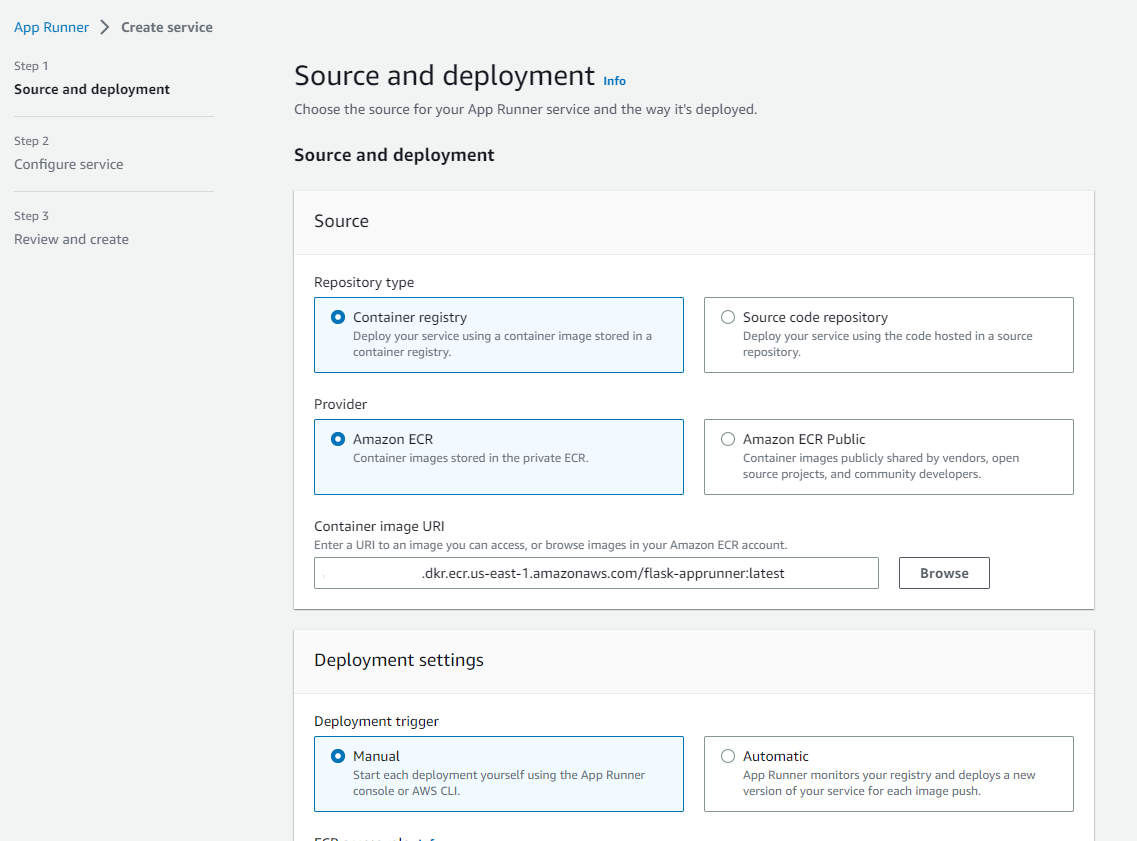
Now that we have a Docker image in Amazon ECR, we can deploy it to AWS App Runner. We can do this using the AWS CLI or the AWS Management Console. To deploy the Flask app to AWS App Runner using the AWS Management Console, we'll need to create a service.
To deploy the Flask app to AWS App Runner using the AWS CLI, we'll need to create a service. There are two types of services: source code services and image services (which we'll use in this example).

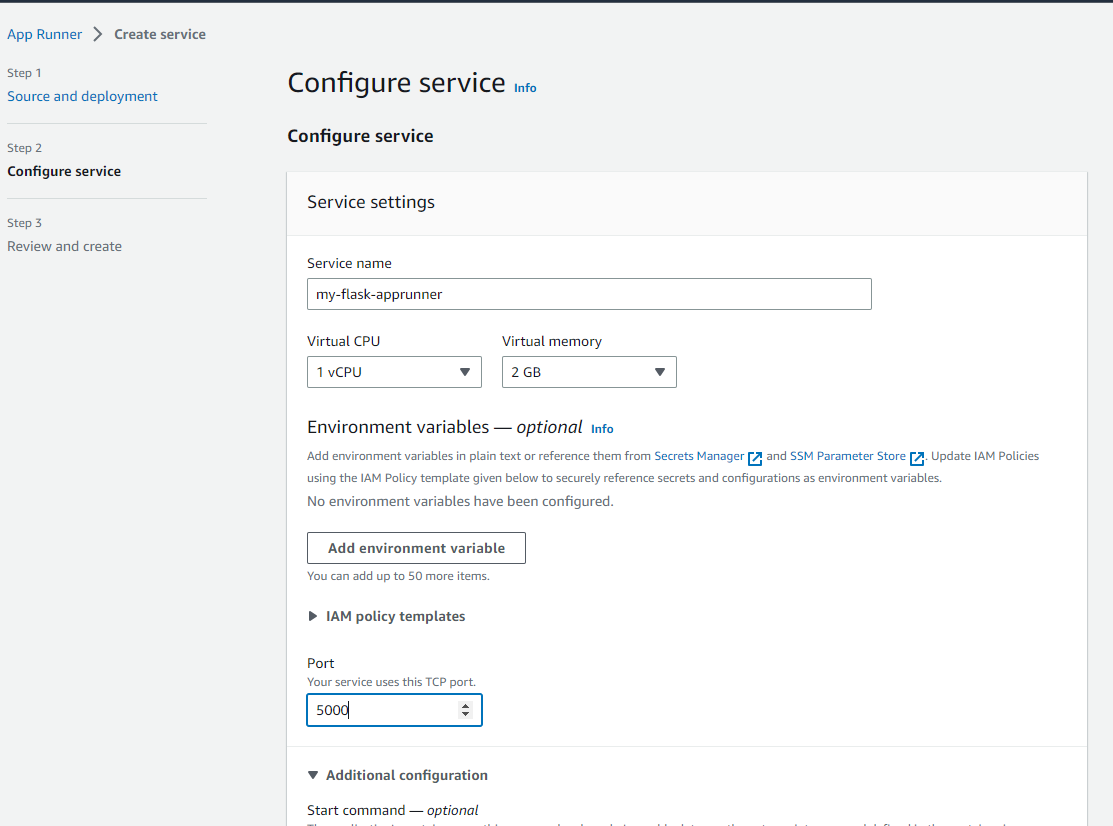
After assigning the IAM role, in the second step, we'll need to specify the service name and the source configuration.

It takes a few minutes for the service to be created. Once the service is created, you can access the app using the URL provided in the service details.
5. Additional Actions
There are some additional actions you can take to further enhance and manage your application:
- Add a custom domain name
- Continuous Deployment
- Auto Scaling
- Monitoring
- Logging
- Customizing the runtime environment
- Customizing the build environment
- Customizing the deployment environment
That's it! You've successfully deployed a Flask web application using AWS App Runner. You can now easily manage, scale, and update your app through the AWS App Runner console or the AWS CLI. Enjoy your deployed application!
